Getting Started (Contributors)
Step 1: Office Setup
Once you are an approved contributor, the next step is to log in and set up your office! You can do this by either by going to your Dashboard, then clicking the Profile tab, or selecting the Profile page directly from the menu that appears when you mouse over your user name at the top of the page (note: you must first be logged in).
On the profile page, you may add your personal avatar, office title, office page banner (like you would on your Facebook page), a contact email for customers, your detailed bio, and a personal website URL of your own.
Step 2: Adding Items
After your office is set up, it’s time to start adding your items! From your Dashboard, click the Add Product tab. Alternatively, you may directly go to the Add Product page by moving your mouse over the front office icon (next to the shopping cart at the top of the page) and clicking on Upload from the fly out menu.
On the new item page, you will add things like the title, the description, category information, images, pricing, and the downloadable item itself. Once that is filled out to your liking, it will be submitted for approval. After it is approved, it will then be visible on the site and ready to be browsed.
Notes & Tips
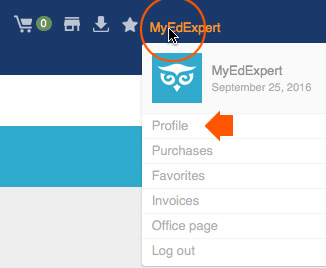
Set up your office by going to the profile page.
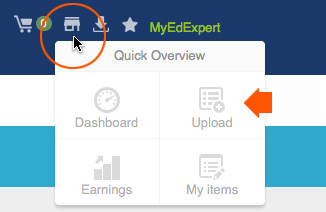
Add new items by going to the Upload page.
How to Zip Files
The examples below show how to zip your lesson files before you upload them. Select the file (or files) you want to include with your item, and then right-click on the selection. For PCs, select “Send to” and then “Compressed (zipped) folder” on the fly out menu. For Macs, select “Compress (#) items” or “Compress (filename)” on the fly out.
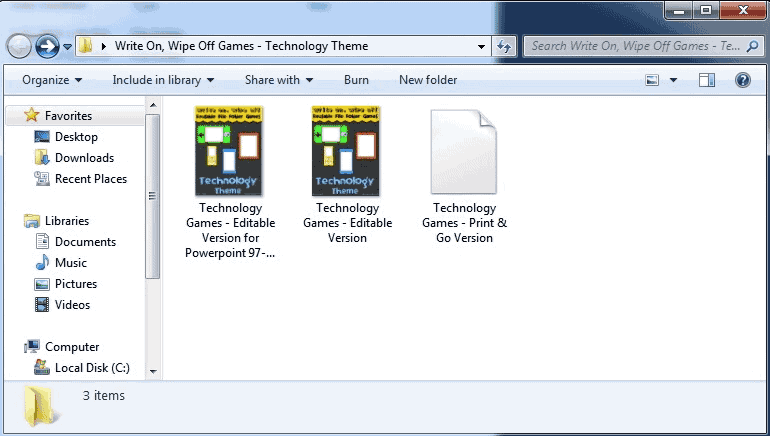
Click above to show how to zip files using a PC.
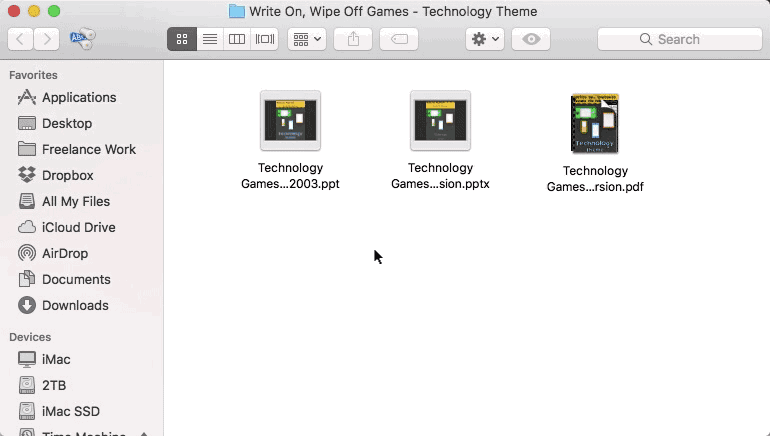
Click above to show how to zip files using a Mac.